Safe Glazing with Vacuum Lifters: Checks, Dual Circuits and Secondary Safety
How to plan safer glass lifts on site: pre-use vacuum lifter checks, independent dual circuits, secondary safety devices and the controls that keep people clear of suspended glazing.
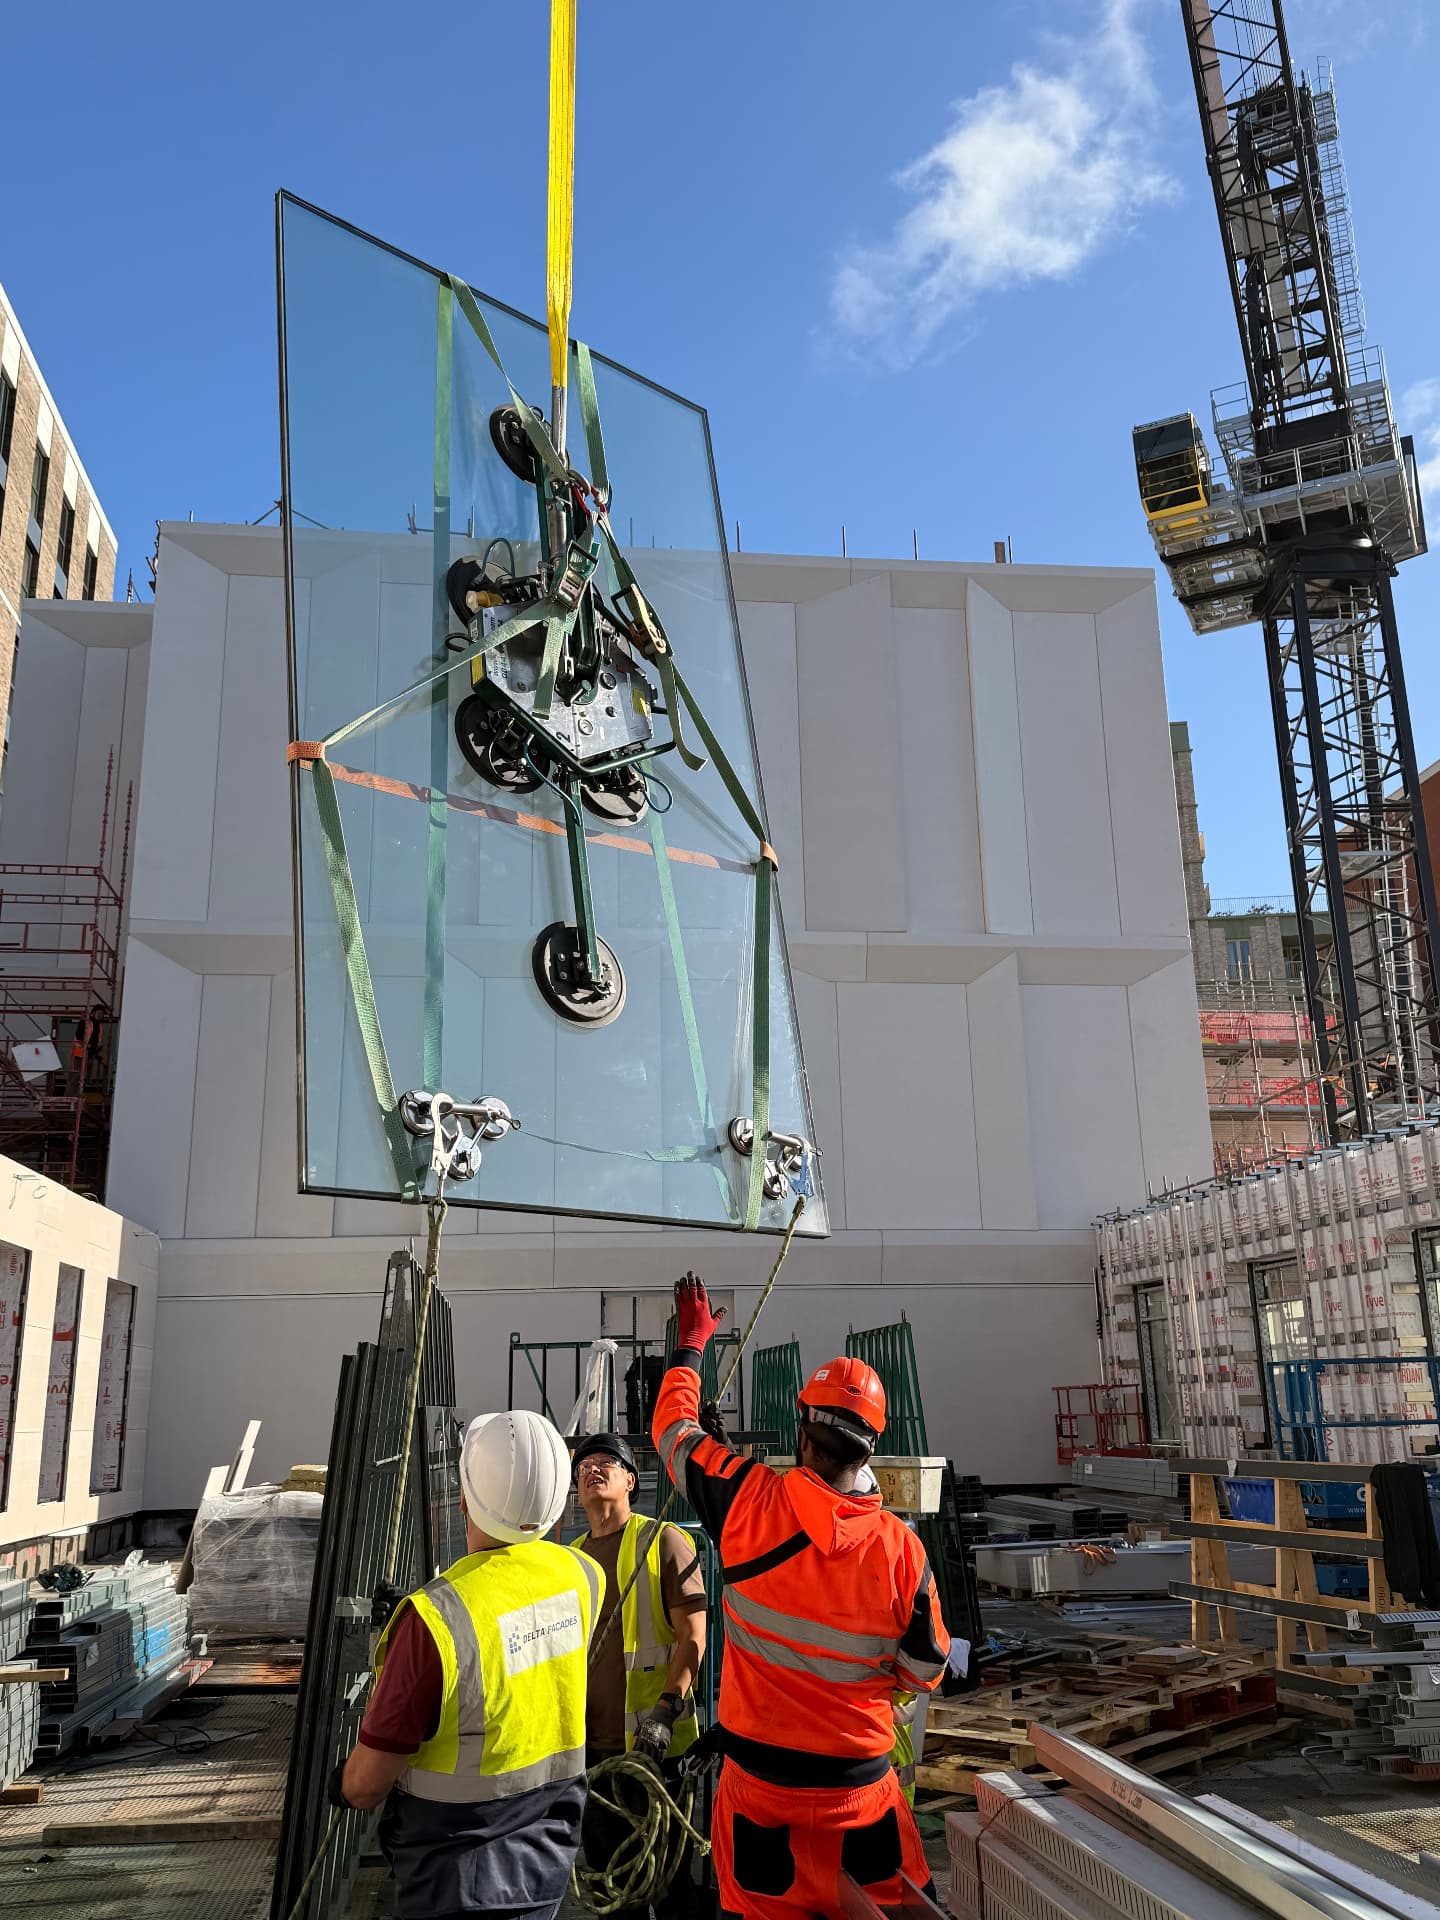
A large glass unit becomes a serious hazard the moment it leaves its stillage. Its weight, fragile edges and exposure to wind demand more than a powerful crane: the entire lift, from the vacuum pads to the landing position, needs a planned and supervised sequence. For an installation-only contractor like Delta Facades, safe glazing is inseparable from good installation.
The photograph accompanying this article shows a glazed panel being handled with a vacuum lifting attachment on a construction site. The visible slings and restraints are a reminder that a lift involves several layers of control; a photograph alone cannot establish the lifter's circuit arrangement, rated capacity or the exact function of each strap. Those details must be checked against the actual equipment and approved lift plan.
Before the Lift: Plan the Whole Route
Under the Lifting Operations and Lifting Equipment Regulations 1998 (LOLER), lifting operations must be properly planned by a competent person, appropriately supervised and carried out safely. For facade glazing, the lift plan and task-specific risk assessment should address the unit's verified weight and dimensions, its centre of gravity, the lifter and crane capacities at the proposed configuration, rigging geometry, landing location and the full travel route.
Coordinate with the principal contractor and crane team before the panel is taken from the stillage. Agree who is directing the lift, what signals or radio calls will be used, where the exclusion zone begins, how nearby trades are kept out, and the wind limits specified for the load and equipment. A broad pane can behave like a sail even when the forecast looks manageable. Stop and reassess if site conditions or the lift configuration change.
Vacuum Lifter Checks Before Every Use
A pre-use check is not a glance at the battery light. The operator should confirm the lifter is suitable for this glass unit and this orientation — not merely that it lifted another unit yesterday. Follow the manufacturer's instructions and the site lift plan, including the stated safe working load and any reduction in capacity for tilting, rotation or the lifting angle.
- Identification and records: Check the equipment ID, rated capacity, current thorough-examination status, inspection records and any reported defects. A thorough examination does not replace a pre-use inspection.
- Pads and contact surface: Inspect every suction pad for cuts, hardening, dirt or distortion. Check that the glass contact areas are clean, dry, sound and free of labels, films, coatings or irregularities that could prevent a reliable seal. Never place a pad across an edge or joint.
- Vacuum system: Inspect hoses, connections, valves, gauges and warning devices. Confirm the power supply or battery charge, the reserve capacity and the audible/visual low-vacuum alarm as instructed by the manufacturer.
- Function test: Verify that the required vacuum is achieved and held, that the indicators respond correctly and that all circuits and emergency functions operate as intended. Carry out the prescribed hold or leak test before travelling with the load.
- Rigging: Inspect hooks, shackles, lifting eye and suspension gear for damage and correct connection. Check the lifter's configuration against the unit's size and centre of gravity.
If a pad will not seal, the gauge drops, an alarm sounds or the equipment is overdue for examination, do not lift. Lower or leave the load in a safe position, isolate the equipment and report the defect. Do not bypass an alarm to keep the programme moving.
Why Dual-Circuit Vacuum Lifters Matter
A dual-circuit vacuum lifter uses two independent vacuum systems, each serving its own group of pads. On equipment designed and rated for the task, one circuit can provide a level of redundancy if the other loses vacuum. That is particularly important for large glazed units, elevated lifts and lifts near occupied work areas, where a single failure could have severe consequences.
Two gauges or two rows of pads do not, by themselves, prove that the circuits are independent. Confirm the manufacturer's circuit diagram, the rated capacity of each circuit in the chosen configuration, alarm behaviour and the required response to a circuit failure. Dual circuits are not permission to continue lifting after an alarm, nor a substitute for an exclusion zone or a secondary restraint. If either circuit fails or falls below its specified operating threshold, follow the lift plan's emergency procedure and bring the panel to a safe position.
Secondary Safety Devices: A Separate Layer
Secondary safety devices can include purpose-designed retaining straps, mechanical catches or other approved restraints that help retain a pane if vacuum is lost. Their suitability depends on the particular glass unit, the lifter, the lifting arrangement and the manufacturer's instructions. They must be rated and fitted as specified, positioned so they do not damage the glass or interfere with pad contact, and inspected before use.
A strap visible in a site photograph is not automatically a certified secondary safety device. The competent lift planner should identify its intended function and verify its capacity, attachment points and compatibility. A restraint may limit the consequences of a failure, but it does not make it safe for anyone to stand beneath a suspended panel. The HSE's vacuum lifting guidance emphasises suitable equipment, good vacuum at the pads, restricted lifting zones and emergency arrangements.
During the Lift and at the Facade
Keep the load as low as practicable along a clear route and never travel it over people. Use the agreed exclusion zone, trained slinger/signaller and controlled communication with the crane operator. Tag lines or other controls may help manage rotation where specified in the plan, but hands must stay clear of pinch points and nobody should try to arrest a moving pane by hand.
At the opening, check that the receiving team has safe access and a prepared landing position. Confirm setting blocks, frame support, edge clearance and the method for releasing the lifter only after the glass is independently supported and secured. Inspect the panel for damage and record the installation checks. If wind, visibility, access or communication deteriorates, stop the lift rather than improvising.
Competence, Supervision and Stop-Work
The lifter operator, crane operator, slinger/signaller and glazing team each have a defined role. Brief the crew on the specific lift, not just a generic method statement, and make sure they understand alarm signals, loss-of-vacuum response and the safe place to lower the load. Equipment should be inspected, maintained and thoroughly examined at the intervals required for its use under LOLER, with defective items removed from service.
The safest decision may be not to lift yet. Taking time to clean a pad, change the equipment or wait for calmer conditions protects people, the glass and the installation itself. That is the standard we expect when installing curtain walling, windows and doors across the UK.
For a project that needs an experienced facade installation team, speak to Delta Facades.